
Step-by-Step: Setting Up Your Roger Table Mic for Large Meetings at Work

Large meetings and conferences can be particularly challenging for deaf and hard of hearing employees. With several people speaking, voices coming from different directions, and background noise to contend with, it’s easy to miss important details, and trying to stay tuned in to what’s being said can be exhausting. That’s where the Phonak Roger Table Mic (working as part of a MultiTalker Network) makes all the difference.
Here’s how to set up your Roger system for success in large meetings:
Step 1: Connect the Microphones in a MultiTalker Network
Gather your Table Mics that you wish to connect in a MultiTalker network (you can connect up to 10 in one network).
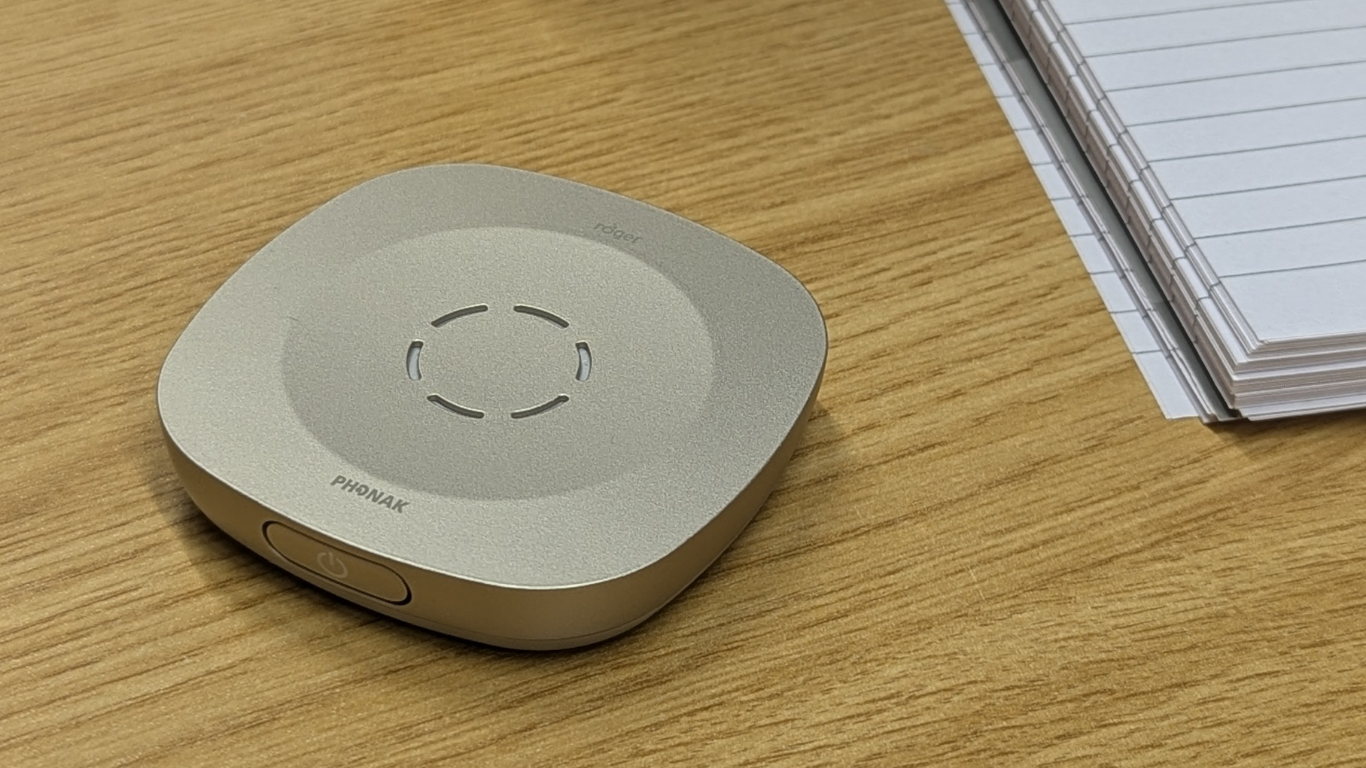
Select your first Table Mic and switch it on by holding down the power button, you will see a green LED light pulsating slowly, indicating the Table Mic is turned on.
Next, take the second of the Table Mics in your series, and also switch this on. On the second Table Mic, locate the connect button which can be found underneath the Table Mic. Hold this Table Mic close to the first Mic while briefly pressing the connect button, both should quickly flash blue and then solid green - indicating that they have successfully been connected.
Repeat this process with any additional Table Mics you wish to add to the network.
This step allows multiple microphones to work as one system, ensuring that speech from all corners of the room is picked up and transmitted clearly. The mics will need to be next to each other to initially form a network, but will remember their connection as you move them later on.
Step 2: Connect to the Receiver
Pair the networked microphones with your Roger receiver. If you don’t use Phonak hearing aids, you can either use a Roger NeckLoop, which connects via the T (telecoil) programme, or a miniature Roger receiver which attaches directly to your hearing aids or cochlear implants. If you have Phonak RogerDirect hearing aids, you can usually connect them directly to the Table Mics.
If the Table Mics have already been connected in a MultiTalker Network (as per the previous step), you can use just one Table Mic to connect to your receiver. Ensure both the receiver and the Table Mic is switched on, then briefly press the connect button while holding it close to the receiver. Again, the Table Mic will quickly flash blue and then solid green, to indicate all Table Mics in the network are now connected to your receiver.
Step 3: Place the Table Mics
Position one Roger Table Mic in the centre of each table or spread across a large boardroom table. Each mic is designed to automatically detect and focus on the active speaker, adapting seamlessly as conversations shift. For large meetings, we would recommend using 1 table mic per 6 people.
Note: if it’s a particularly large meeting, you may want to use a Phonak Roger On microphone for the lead presenter of the meeting to use in ‘presenter mode’.
Step 4: Check Audio Levels
Before the meeting begins, test the system to make sure all mics are connected and working correctly. A quick sound check will confirm the setup is ready to go.
Note: If you’re using a Roger NeckLoop, the connection can be tested by a non-hearing aid user with headphones plugged directly into the NeckLoop device.
Step 5: Run Your Meeting with Confidence
With the MultiTalker Network in place, you’ll be able to follow the conversation clearly, no matter how many people are speaking or where they’re sitting.

Workplace Inclusion Matters
Assistive technology like Roger Table Mics play a vital role in making group meetings more accessible - but inclusion goes further than technology alone. Employers are responsible for ensuring all staff can participate fully, and the Access to Work scheme can cover the cost of these solutions.
Employees can guide their employers to our Inclusion in the Workplace page to request a quote or download our full guide on creating inclusive workplaces.